Best Marvel Rivals Settings To Level Up Your Gameplay
It’s no secret that you will have to use the best Marvel Rivals settings to consistently perform well and outrank your opponents in the game. However, with so many customization options such as audio, video, sensitivity, controller, and keyboard, it’s hard to figure out the best combination of settings, especially if you’re a beginner.
While you can also play at the default settings if you casually play the game. But if you really want to level up your skills, you will want to use the best Marvel Rivals settings. Taking all those factors into account, we’ve finally found the optimized settings that cater to almost all the Marvel Rivals players.
Top Marvel Rivals Optimized Settings Guide
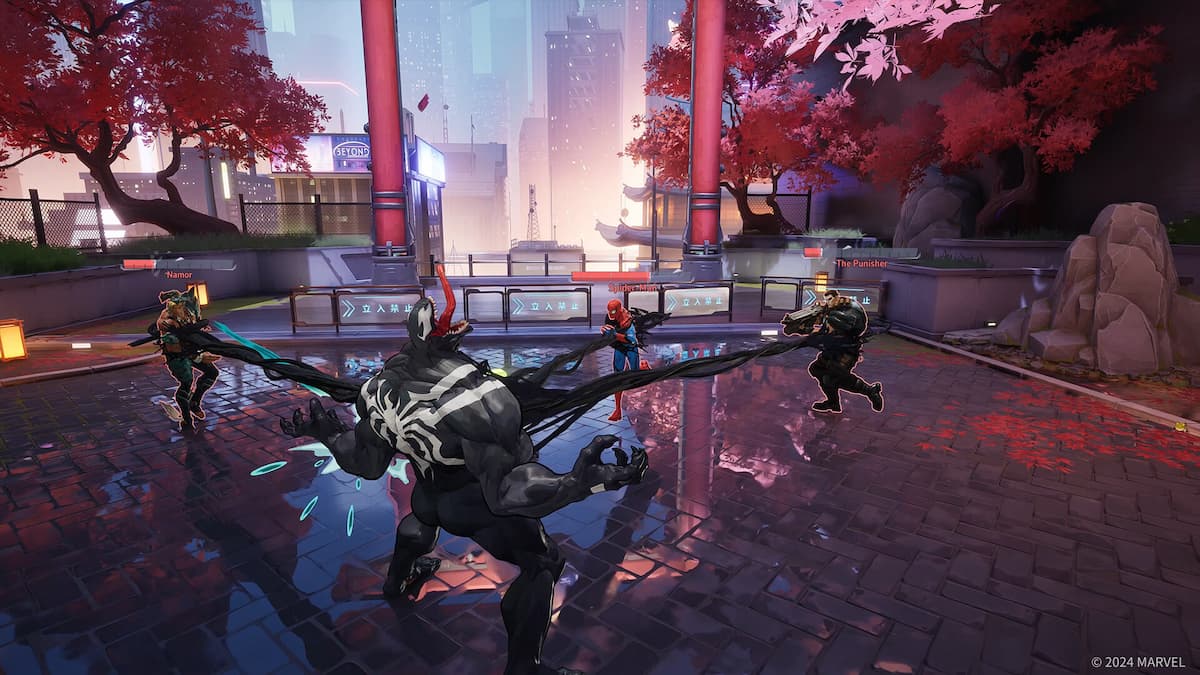
Image Credits: NetEase Games
We’ve divided this guide into different sections, such as graphics, audio, keyboard, mouse, and controller, for your convenience.
Best Marvel Rivals Display Settings (graphics and video)
Your display settings have a huge impact on your game’s performance. Since Marvel Rivals is an FPS title, we recommend using the settings that yield the maximum frames (FPS). A lot here will also depend on your system, your specs, and what you want to maintain in terms of your experience.
Here’s the list of best display settings:
- Limit FPS: Off
- Show FPS: On
- Network Stats: On
- V-Sync (VNC): Off
- Display Mode: Borderless Windowed / Fullscreen
- Aspect Ratio: Match Display
- Resolution: Match Display
- Anti-Aliasing and Super Resolution Type: DLSS (NVIDIA) / FSR (AMD)
- Super Resolution Mode: Ultra Quality / Quality
- Super Resolution Sharpening: Preference
- Frame Generation: Off
- Low Latency Mode: NVIDIA Reflex Low Latency
- Brightness: Preference
- Game Language: Preference
When it comes to the graphics and quality settings, there is a lot you can do to optimize. We suggest you hit this optimize setting, and this will kind of adjust the game to your PC specs. It’s a good way to start. Also, make sure to check if your system meets the minimum requirements to run the game.
- Graphics Quality: Custom
- Global Illumination: SSGI – Low Quality
- Reflection Quality: Disable
- Model Detail: Low
- Post-Processing: Low
- Shadow Detail: Medium
- Texture Detail: Low
- Effects Detail: Low
- Foliage Quality: Low
We have set everything to low except the shadow detail. This will definitely help you to increase your frame rates especially if you have a potato PC or mid-range setup. Those who have big graphic cards like 4090 installed in their system can definitely ramp it up to improve their visual experience without compromising the frame rates.
Audio Settings
Just like graphics, audio also plays a key role in FPS titles like Marvel Rivals. In fact, there are plenty of settings that can cause distractions while your entire focus is on those breathtaking 1v1 clutch situations. Here’s the list of audio settings we recommend using in the game:
- Master Volume: 70
- Sound Effects Volume: 70
- Lobby Ambiance Volume: 30
- Music Volume: 20
- Lobby Music Volume: 80
- In-Game Voice Volume: 50
- Output Device: Preference
- Playback Mode: Match Output Device
- 3D Enhancement: On
- Background Playback: On
- Input Device: Preference
- Voice Chat Mode: Push to Talk
- Voice Chat Volume: 80
- Mic Volume: 80
- Voice Chat: On
- Voiceover Subtitles: Preference
- Voiceover Language: Preference
- Mix Presets: Default
- Hit Indicator Volume: 4
- Material Layer Volume: 100
- UI Layer Volume: 100
- Healing Sound Volume (Healing Others): 3
- Healing Sound Volume (Being Healed): 3
- Damage Volume: 3
- Announcer Volume: 3
- KO Sound Cue (Teammate KO Announcement): Off
- KO Sound Cue (Enemy KO Announcement): Off
- Free Cam Character Voices: On
- Free Cam System Voices: On
- Keyboard and mouse
Figuring out an optimal mouse sensitivity is crucial to landing perfect headshots. While you can use our combination of sensitivity settings, we strongly recommend hoping into multiple practice sessions before trying out in your regular matches. This will help you to get used to it and as a result, you’ll feel more confident with your aim.
For the keyboard part, you can go with the default settings as NetEase game has already got the job done for you for researching the best keybinds for this game.
- Keyboard settings: Mostly default, no need to overstress.
- Forward: W
- Back: S
- Left: A
- Right: D
- Jump: Space
- Ascend: Space
- Descend: Ctrl
- Primary Weapon: 1
- Secondary Weapon: 2
- Reload: R
- Primary Attack: Left Click
- Secondary Attack: Right Click
- Previous Weapon: Scroll Up
- Next Weapon: Scroll Down
- Melee Attack: V
- Ability 1: E
- Ability 2: Left Shift
- Ability 3: F
- Ultimate Ability: Q
- Team-Up Ability 1: Z
- Team-Up Ability 2: X
- Team-Up Ability 3: C
- Environmental Interaction: G
- Sensitivity: 800 DPI with 1.7/1.7.
- Full mousepad swipe = 360-degree turn.
- Player preference matters; start lower and adjust.
- Invert Horizontal Look: Off
- Invert Vertical Look: Off
- Additional settings: Everything off.
- Reticle:
- Default is bad; switch to advanced settings.
- Preferred crosshair: Green, clean, and accurate.
- Settings:
- Opacity: 80
- Width: 60
- Outline opacity: 100
- Blur: 0
- Crosshair length: 20
- Crosshair angle: 0
- Color (lime green): 12, 252
- Lime green is visible on all maps.
- Alternative: Pink (not commonly found in maps).
- Allied health bars: Default.
- Binds: Mostly default.
- UI settings: Default, available for copying.
- Communication settings: Default.
- Spectating settings: Default.
- Controller settings
Not everyone likes to aim with a mouse and control their character with a keyboard. For those, the controller is definitely a lifesaver, as they enjoy the game playing on their couch. Surprisingly, the controller has more customization options if we compare it with the keyboard and mouse counterparts. Therefore, it may take you some time to understand all the settings and get used to it.
Before we dive into the settings, we wanted to take a moment to answer one of the most burning questions among the players: “Does Marvel Rivals have aim assist?” Yes, Marvel Rivals has aim assist for controllers on PC, PS5, and Xbox. However, many players claim that the PC version’s aim assist is weaker than the PS5 and Xbox versions. The most astonishing part is that it is also customizable in the controller options menu.
Below, we’ve put together the best controller configuration:
General
- Cursor Sensitivity: 130
- Vibration: Off
- Trigger Effect: Off
Combat
- Marvel Rivals Stick Settings
- Horizontal Sensitivity: 180
- Vertical Sensitivity: 100
- Aim Sensitivity Curve Type: Linear Curve
- Minimum Input Deadzone: 1
- Maximum Input Deadzone: 1
- Max Deadzone Sensitivity Boost: 4
- Horizontal Max Deadzone Response Time: 30
- Swap Left and Right Sticks: Off
- Invert Horizontal Look: Off
- Invert Vertical Look: Off
- Aim Assist Window Size: 40
- Aim Assist Strength: 80
- Projectile Heroes Aim Assist Ease In: 80
- Hitscan Heroes Aim Assist Ease In: 40
- Melee Heroes Aim Assist Ease In: 0
- Disable Aim Assist at Max Deadzone: Off
HUD
- Reticle Save: Default
- Reticle Type: Crosshairs
- Width: 10
- Reticle Opacity: 100
- Outline Width: 50
- Outline Opacity: 100
- Blur: 0
- Center Gap: 33
- Crosshair Length: 30
- Crosshair Angle: 0
- Color: White
- HUD Widget Size: Default
- Allied Health Bars: On
UI
- Hero Profile: D-Pad Up
- Chrono Vision: D-Pad Right
- Toggle UI: Default
- Scoreboard: Default
Communication Settings
- Ping Button: D-Pad Down
- Number of Wheel Sections: Four Sections
- Inputs: Default
Similar to the keyboard and mouse, our top recommendation for the controller players is to dive into the practice range and test all the movement, sensitivity and keybinds for better control over your character in the game. We can understand it’s kind of a boring task for most players as many would like to directly jump into the game. But if you’re someone who really wants to improve their skills, the practice range mode is your best buddy.
Before leaving, take a look at who are the next Heroes arriving in Marvel Rivals.
