Black Ops 7 Overload Mode: How It Works & How To Play

Call of Duty: Black Ops 7’s Overload is a new game mode offering players a team-based experience in Multiplayer. The objective is to escort a device into enemy-controlled zones. Despite this simplicity, players have noticed that the game provides little clarity on the mode’s mechanics post-launch.
This guide provides a full breakdown of how Overload works in BO7 Multiplayer, including tips on mastering specific roles, understanding device mechanics, and the best loadouts and strategies, to help you secure a win.
- 1. What Is Overload Mode In Black Ops 7?
- 2. How Overload Mode Works In Black Ops 7 (Full Mechanics Breakdown)
- 3. How To Play Overload Mode In Black Ops 7 (Beginner’s Guide)
- 4. Roles & Responsibilities In Black Ops 7 Overload Mode
- Carrier & Escort Strategy Tips
- Defensive & Zone Control Roles
- 5. Scoring System & Win Conditions Explained
- 6. Best Loadouts For Overload Mode In Black Ops 7
- 7. Black Ops 7 Overload Device Spawns & Control Zones (Per Map)
- How Device Spawns Work Across All Maps
- 8. Black Ops 7 Overload Mode Advanced Strategies (For Ranked & Competitive)
- 9. FAQs
What Is Overload Mode In Black Ops 7?
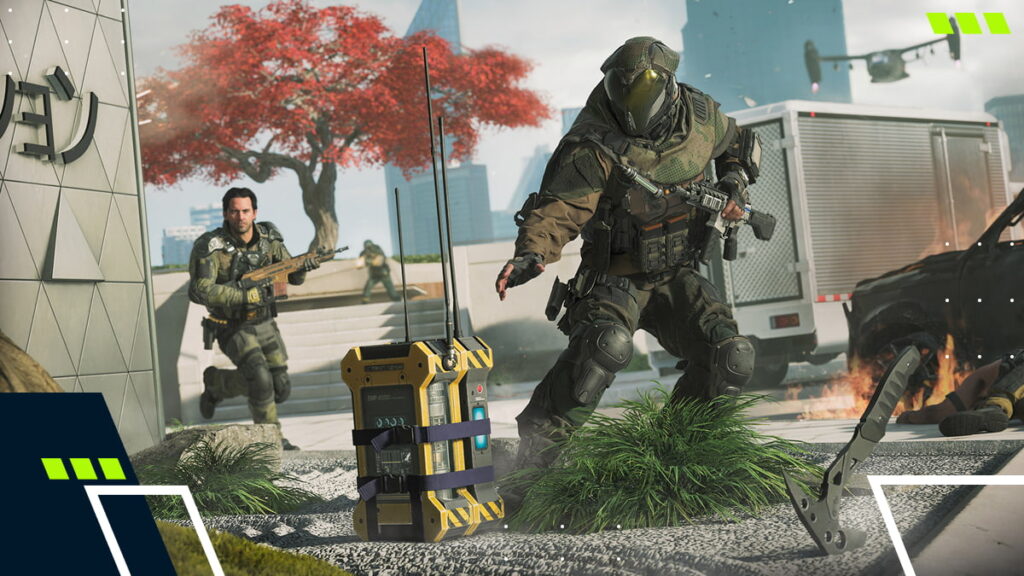
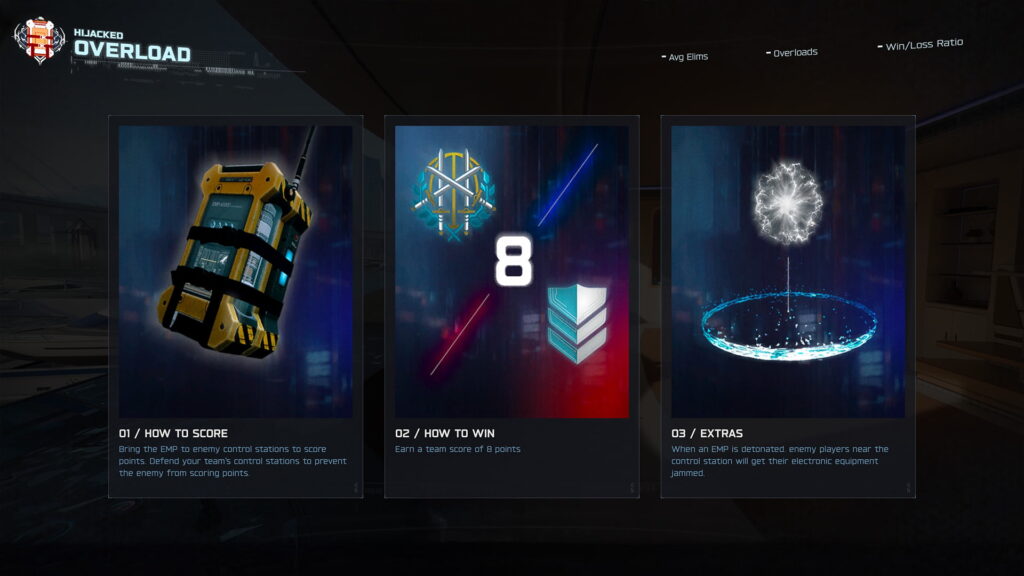
Black Ops 7’s Overload is a tactical mode that pits two teams of six players against each other. The objective is to secure the device (EMP), which spawns in one of two or three fixed locations (depending on the map), and successfully transport and deposit it into one of two enemy Control Zones.
The enemy carrier is marked live on both the field and the minimap, making it an easy target to track. While holding the EMP, the carrier is also restricted to using only their Secondary Weapon.
Matches are divided into eight rounds. Teams switch sides after four completed rounds by score. The device spawns in the center of the map, preventing either team from gaining an unfair spatial advantage.
How Overload Mode Works In Black Ops 7 (Full Mechanics Breakdown)
The Overload mode rules in Black Ops 7 are pretty straightforward. The device spawns at fixed locations, all situated in the map’s central area. Once secured, the carrier must transport the device without dying to one of the two enemy Control Zones. These sites are located within the enemy’s base.
If the carrier dies, the device will be dropped at their location. From there, teammates or enemies can pick it up. Scoring is also simple: the carrier must step into an enemy Control Zone while holding the device. This will trigger an EMP detonation, disabling the HUD from nearby enemies.
In Black Ops 7, Overload uses a fixed respawn system, where each team reappears at their base. This makes spawn trapping possible, as players can hold the enemy’s spawn zone and eliminate opponents the moment they respawn, preventing them from escaping.

How To Play Overload Mode In Black Ops 7 (Beginner’s Guide)
If you’re jumping into BO7’s Overload mode, the following tips will help you win. Once the match starts, check if your teammates are attempting to retrieve the device. If they aren’t and you go for it, make sure you have teammates nearby so you aren’t easily exposed.
To pick up the device, simply move to its position and walk over it. Performing this action will automatically pick up. Once the EMP is in your possession, try to avoid main routes to the enemy Control Zones. Instead, sneak through corridors or alternate paths to stay better protected from enemy fire.
Also, make sure to head toward an area where you have teammates and essentially drag them along to follow you. If you aren’t the carrier, watch your teammate’s actions and try to limit the enemy’s angles of attack to clear the path for them.
Roles & Responsibilities In Black Ops 7 Overload Mode
Understanding roles is essential for teamwork to execute a winning Overload mode strategy. This mode features theoretical roles: Carrier, Escort, Zone Defender, Zone Breaker, and Forward Scout.
The Carrier is the person responsible for transporting the device into the enemy Control Zones to score. The Escorts accompany and protect the Carrier to keep them alive, while the Forward Scout gathers intel before choosing a route to advance toward the enemy base.
For the Zone Defender and Breaker, the key is positioning. The Zone Defender is a fixed defensive player stationed inside the spawn to eliminate the enemy Carrier. The Breaker is the offensive counterpart, tasked with pushing the site to clear the area so the team can enter and score.
Carrier & Escort Strategy Tips
In Black Ops 7 Overload mode, both the Carrier and Escort roles work as partners.
In particular, the Carrier relies on the rest of the team to act as escorts, clearing a path to the enemy base to ensure they survive the run. While one eliminates enemies along the way and acts as bait, the Carrier focuses on rapid movement to reach the enemy base and score.
Keep in mind that you are heavily dependent on your teammates’ support. Clearing a path to the enemy base while eliminating every rival in your way can quickly become a difficult task on your own. To succeed, in-game communication, whether via chat, live pings, or voice, is also crucial.
Defensive & Zone Control Roles
When it comes to defense, your best asset for executing the best Overload defensive strategy in Black Ops 7 is map control—specifically, holding down the central zone. This ensures you can cut the enemy Carrier’s run short and launch a counterattack.
If you are part of the team staying at the base, clearing out lingering enemies who might try to spawn trap is key. You cannot afford to lose control of your own base. Additionally, keeping an eye on corridors or flank routes where enemies might sneak through is vital to shutting down surprise attacks.
To pull this off, check your teammates’ in-game positions and the minimap to read enemy rotations and identify which zones are unguarded and need covering. Constantly reducing the enemy Carrier’s maneuvering space will not only stop their current push but also put you in a better position to launch your next attack immediately after.
Scoring System & Win Conditions Explained
Black Ops 7’s Overload mode scoring system awards a single point per successful overload completed.
The match consists of two rounds played to four points, requiring a total of eight points to win. Once four points are reached, the teams switch sides. However, this does not alter the mechanics of the mode; only the side of the map each team occupies is changed.
If the teams tie on points, overtime becomes a Sudden Death round, where eliminated players cannot respawn. To win, teams must either eliminate all enemy players or successfully deposit the device in the enemy base in under two minutes.
Best Loadouts For Overload Mode In Black Ops 7
Winning and dominating matches depends on having the best loadouts for Overload mode, tailoring your equipment and Perks to fit the pace and playstyle of the mode.
When it comes to weapons, options range from SMGs and ARs (for mobility and comfort) to Sniper Rifles (for controlling lanes from a distance and stopping enemies from entering your base to score).
Here are some loadout recommendations for Black Ops 7 Overload:
- Barrel: 17″ Ristraich Nimbus Barrel
- Underbarrel: MFS R-Stop Handguard
- Laser: 5mw Lockstep Laser
- Rear Grip: R-1 Shelf Grip
- Fire Mods: Light Bolt
Maddox RFB Assault Rifle
- Optic: Lethal Tools ELO
- Barrel: 24″ Assemblage Barrel
- Underbarrel: H-Lock Foregrip
- Muzzle: VAS 5.56 Suppressor
- Rear Grip: Hallux Mix Grip
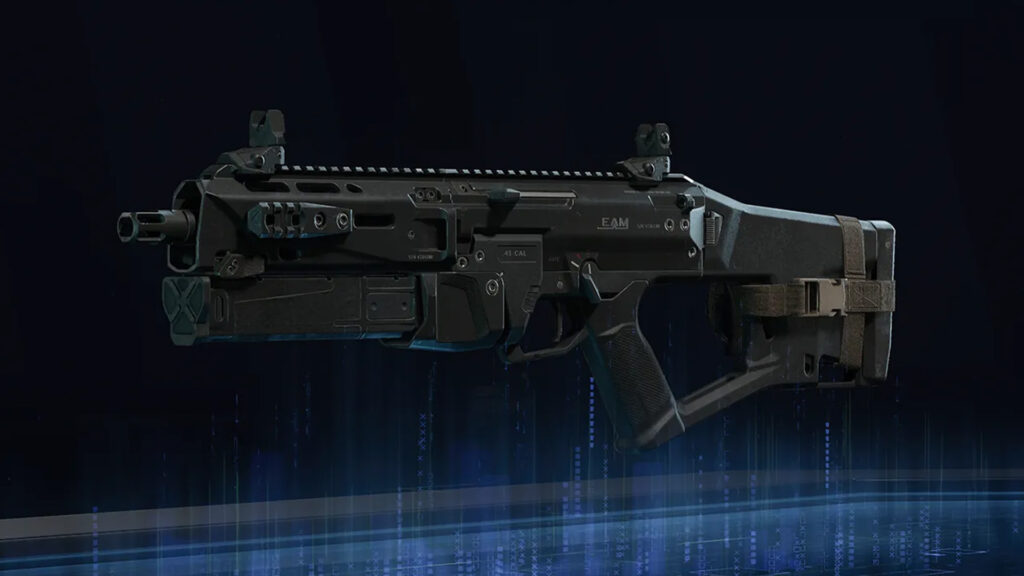
Dravec 45 SMG
- Muzzle: Bowen .45 Suppressor
- Barrel: 19″ EAM Horizon Barrel
- Magazine: Gator Extended Mag
- Rear Grip: Herald-Z1 Grip
- Stock: Serval Q-Step Stock
When building your loadout, prioritize speed and awareness with these Perk picks:
- Slot 1: Lightweight (movement speed and agility) or Gung-Ho (shoot while sprinting). Flak Jacket is also a strong choice for tanking explosive damage.
- Slot 2: Vigilance expands your minimap coverage and alerts you when you are on enemy radar.
- Slot 3: Tracker hunts down close-range threats via footprints and radar pings.
Black Ops 7 Overload Device Spawns & Control Zones (Per Map)
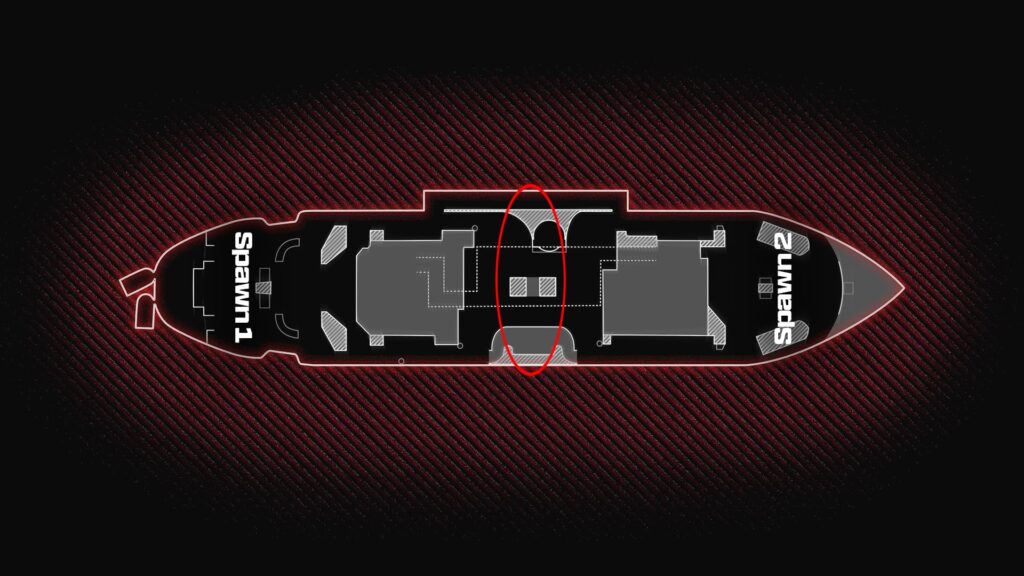
Each BO7 map features up to three different Overload device spawn points, depending on the map’s structure. All of them are located in the central area, marking two sides for each team with a neutral zone where both teams have an equal chance to reach.
Inside each team’s spawn, there are two Control Zones where the opposing team must enter to deposit the device. On the defense case, they must prevent the carrier and attacking team from reaching them.
The best routes for easily depositing the device are usually the central corridors or side lanes that lack heavy enemy presence and are covered by your teammates. The best move is to push the side opposite where the device spawns. From the central spawn, you have two possible lanes, so you can quickly choose the safer or more open side to pressure.
How Device Spawns Work Across All Maps
Since most BO7 maps are mostly symmetrical, the device spawn will always appear along the center line of the map.
While some maps don’t feature a strict three-lane layout (meaning the specific side or center spots might vary), this rule generally holds across all maps to ensure the zone remains neutral and both teams have an equal chance to reach it.
Typically, the device will spawn at the center first and then rotate to the side locations if the map allows. However, in most cases, your best bet is to play aggressively on whichever side offers the best cover (whether through map geometry or spacing).
Check out the device spawn zone using the Hijacked map as an example below.
Black Ops 7 Overload Mode Advanced Strategies (For Ranked & Competitive)
In competitive Overload mode play, pressure the rival to limit their map control and constantly monitor the device’s location to maintain control. Knowing which routes are the safest for carrying the device lets you attack them and counterattack while the enemy is repositioning.
Team coordination and task division are critical. While one teammate serves as the device carrier, others must clear a path through enemies and split resources to defend against surprise counterattacks.
Scorestreaks are particularly useful during match points or critical moments where losing a point would give the opposing team too large a lead, effectively knocking you out of the match.
FAQs
What is Overload mode in Black Ops 7?
Overload is a 6v6 mode in Black Ops 7 where two teams fight to secure a Device and deposit it into enemy Control Zones to score.
How does the Overload Device work in BO7?
The Overload device in BO7 acts as a mobile objective that must be transported across the map to score points and win the match. It also functions as an EMP: once deposited, it releases an electrical charge that disrupts the HUD of nearby opponents.
How do you score points in Overload mode?
To score points in Black Ops 7 Overload mode, all you need to do is pick up the device and carry it to the enemy base, entering either of the two marked Control Zones on the ground.
What’s the best strategy for winning Overload matches?
The best strategy to win Overload in BO7 is to coordinate as a team and be aggressive. You need to control the device as much as possible and pressure the enemy through map control, ensuring your allied Carrier can score without difficulty, clearing paths for them to move through.