VALORANT Ascent Map: Layout, Callouts, Attack & Defense Strategies

- The strategic balance of VALORANT exists on Ascent because this map requires Mid control to achieve its fast rotation speed and extended sight distances.
- Callout mastery and utility timing are essential, especially around A Main, Market, and B Main, where most early-round fights occur.
- The top agents include Omen, Sova, Jett, and Killjoy, who provide abilities to dominate Ascent’s wide lanes and choke-heavy site entries.
VALORANT Ascent map is one of the game’s most defining locations. Its wide Mid, open skybox, and flexible triple-lane design lead to heavy contestation over mid control, site executes, callout knowledge, and building optimal team compositions.
In this guide, you’ll find an in-depth breakdown of the map, including its layout, key callouts, A/B site strategies, mid-control fundamentals, and the recommended agents. This page was last updated on November 28, 2025, to reflect the current meta.
- 1. What Is The VALORANT Ascent Map?
- 2. VALORANT Ascent Map Layout & Callouts (Full Overview)
- A Site
- Mid
- B Site
- 3. Best Agents For Ascent Map In VALORANT
- Best Controllers for Ascent
- Best Initiators For Ascent
- Best Duelists For Ascent
- Best Sentinels For Ascent
- 4. How To Attack On VALORANT Ascent Map
- A Site Execute Strategies
- Mid-Control to B Site Splits
- B Site Entry Strategies
- 5. How To Defend On VALORANT Ascent Map
- A Site Defensive Setups
- Mid Defense Principles
- B Site Defensive Setups
- 6. Tips & Tricks To Win On Ascent
- 7. FAQs
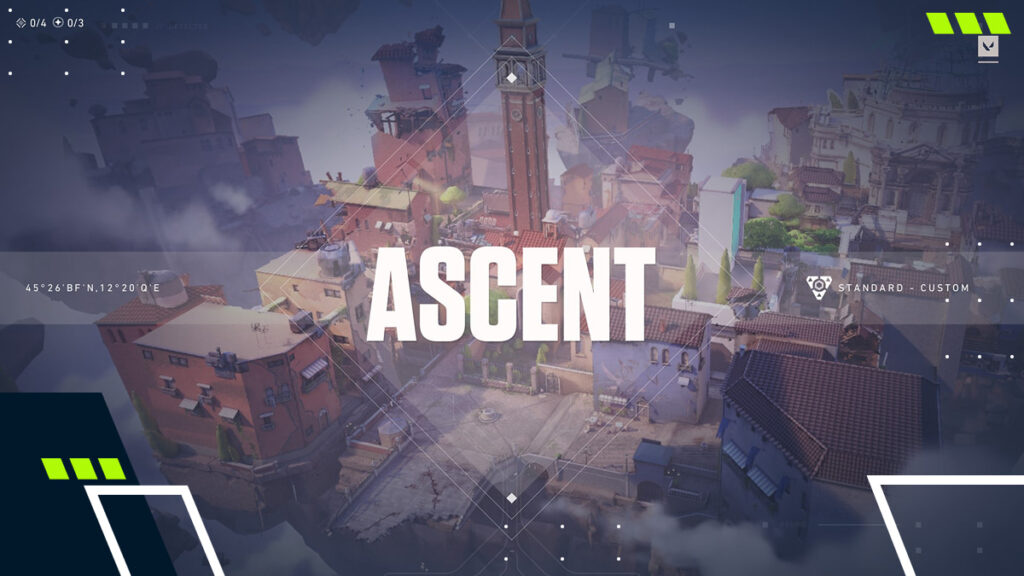
What Is The VALORANT Ascent Map?
Inspired by Venice, Italy, the VALORANT Ascent map is one of the game’s most iconic and balanced locations. Part of the original beta map pool, its gameplay revolves around Mid control, which provides quick access to both bomb sites and creates a balance between attackers and defenders.
Teams are forced to contest Mid early in the round, leading to long-range duels and high-impact fights across open sightlines. When examining what is VALORANT Ascent map layout is, we find it features two bomb sites (A and B) supported by key structural areas like Market and Catwalk that shape map rotations and the overall tempo.
Its manually operated metal doors add an extra layer of strategy that both teams must take into account.
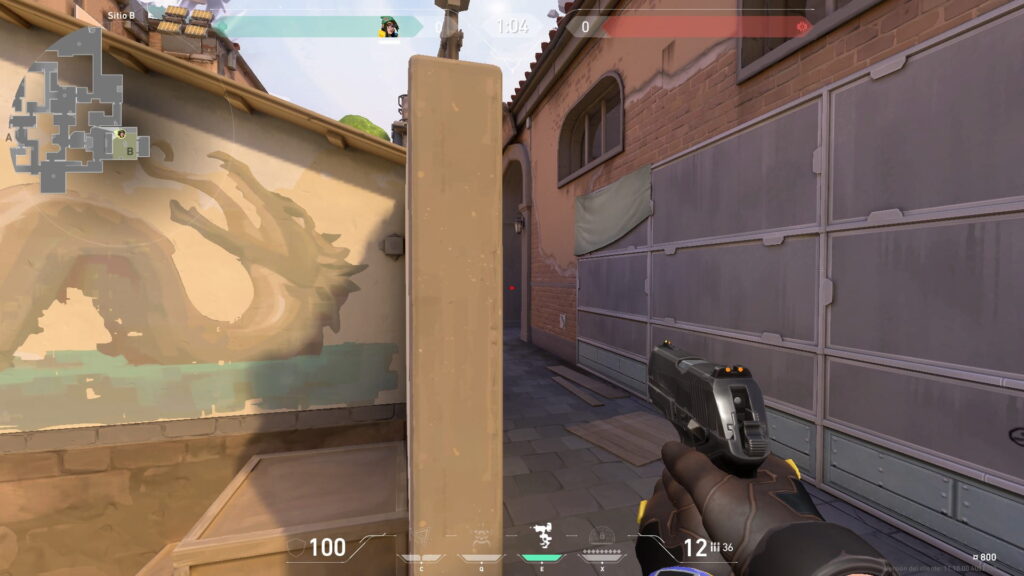
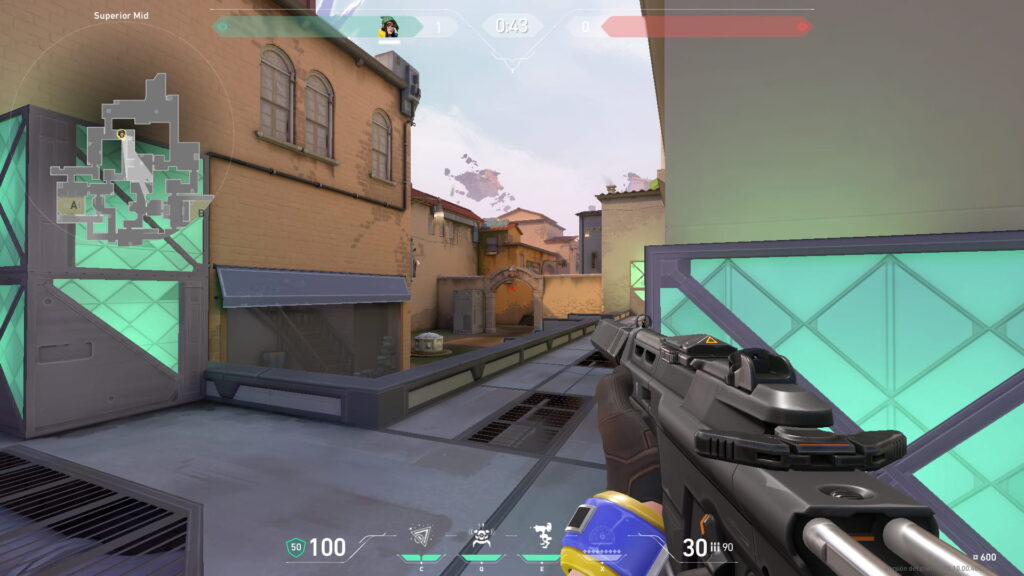
VALORANT Ascent Map Layout & Callouts (Full Overview)
VALORANT Ascent’s three-lane design (Site A, Mid, Site B) allows for fast rotations. Its open skybox and long sightlines force players to manage utility effectively. Mid serves as the pivotal rotation hub, and the team controlling it determines how quickly they can execute or rotate.
Clear VALORANT Ascent callouts are essential for defining tactical plays. Key areas include A Main, A Heaven, Mid Market, and B Main. Here’s a callout table to complement this guide to Valorant Ascent callouts.
| Area | Callout | Tactical Description/Purpose |
|---|---|---|
| A Site | A Main | Primary attacker entry route into A Site; tight choke point. |
| A Site | Heaven (A) | Elevated platform; key defensive and retake angle. |
| A Site | Tree (A Link) | Area connecting A Site to Mid. Essential for map control. |
| A Site | Door (A Door) | Mechanical door used to block the line of sight during plant/retake. |
| A Site | Hell (Under Heaven) | Area below Heaven, often used to hide from vision. |
| Mid | Mid Top | Area attackers must secure before pushing Catwalk/Market. |
| Mid | Catwalk | Elevated path from Mid Top towards A Link. |
| Mid | Market | Entry into B Site, crucial rotation hub. |
| B Site | B Main | Primary attacker entry to B Site; common sniper position. |
| B Site | Boat House | Cover on B Site, often used for planting or defense. |
| B Site | Pillar (B) | Central cover on B Site. |
| B Site | Logs | Corner cover/chokepoint inside B Main. |
| General | CT Spawn | Defenders’ spawn location. |

A Site
On the VALORANT Ascent map A Site, most of the early pressure comes through A Main. Attackers rely on utility to gain space, while tight corners give defenders tools to stall pushes. Control of Tree and Link is vital for clean entries.
The verticality of areas like Heaven and Hell defines the site’s layout. Defenders use the mechanical Door to block key routes, controlling the round’s pace and making default plant spots harder to reach.
With clear Ascent A Site callouts and good utility timing, teams can coordinate entries, delay attacks, or set up efficient retakes.
Mid
The tempo of Ascent revolves around Mid, as rotation speed and map pressure depend on which team controls the area. From the attackers’ side, securing Mid Top is crucial, as it opens paths toward either site while enabling strategies like jiggle peeks.
Defenders controlling Mid gather crucial information and cut rotation routes through Mid Market or Catwalk. Effective utility usage is essential to maintain control without overexposing players. High-level tactics often include lurking or pre-firing common angles to gather intel. These moves cut rotations while the team prepares site entries.
B Site
The action on B Site mostly revolves around B Main, where attackers must clear angles like Logs before entering the site. The various chokepoints around Boathouse, Back Site, and Pillar give defenders some of the best angles to hold on Ascent VALORANT.
In front of Boathouse, you’ll find one of the strongest plant spots. This benefits from a direct line of sight to B Main. Another solid option is near the Market door, which enables cleaner mid splits and better zone control. Controlling Market is crucial as it allows both sides to dictate the pace of the round.
Lurkers also play an important role in B rotations. They can come through Mid into Market or hit late timings through Defender Spawn to punish aggressive holds or disrupt rotations.
Best Agents For Ascent Map In VALORANT
Ascent is defined by its long sightlines and heavy emphasis on Mid control. The best agents on the VALORANT Ascent map are those that can execute, clear, and manage large areas. This also explains why double-sentinel compositions are among the most popular.
Here’s an overview of the best agents for Ascent in VALORANT, including their role synergies and the reasons they’re considered some of the best agents on Ascent.
Best Controllers for Ascent
Omen sits at the top of the ascent VALORANT controller picks even after recent nerfs, thanks to his long-range smokes that can block A Main or B Main without exposing himself. His flash adds even more value, helping delay enemy entries or create aggressive openings for his team.
Astra, on the other hand, is an equally strong option but shines most in coordinated teams. Her Stars deny key areas of the map, and her global presence makes a huge difference when cutting entries, controlling Mid, and setting up precise executes or retakes.
Best Initiators For Ascent
Among the best initiators for Ascent, Sova stands out as the most consistent option. His drone provides reliable info and site clearing. His recon bolts and ultimate make entries and choke control much safer.
Fade is a strong alternative. She uses her Haunt and Prowlers to clear space and relieve pressure on mains. Her ultimate is especially impactful in post-plants. Skye offers great versatility, with her flashes and info tools helping teams contest and control Mid.
Best Duelists For Ascent
Jett stands out among the best duelists for Ascent. She excels in mobility and verticality, which allows her to make fast plays. Her abilities help create space and pressure enemies from unexpected angles.
Raze, on the other hand, can control Mid thanks to her utility, clearing areas and forcing defenders to fall back. Her damage output and constant pressure make rapid and aggressive site entries much easier.
Best Sentinels For Ascent
Killjoy stands out among the best sentinels for Ascent thanks to her turret and grenades, which help control entry points and slow down enemy pushes, especially on B Site. Her straightforward yet efficient defensive style makes her one of the most popular picks.
Cypher, on the other hand, excels at gathering constant information with his cameras and trapwires, while his Cage can confuse enemies and provide additional protection, making him particularly strong on A Site.
How To Attack On VALORANT Ascent Map
When attacking on Ascent, securing Mid control is essential. It keeps pressure on both mains and forces defenders to spend utility early. This opens opportunities for lurks that punish late rotations. Winning Mid naturally splits the defense and creates space for coordinated site hits.
A Site Execute Strategies
Executing onto A becomes much safer with a duelist–controller setup. Smoking Heaven, Tree, and Door create clean entry paths for your team. After the spike is planted, holding from A Main and Hell offers strong post-plant control, giving attackers safe angles to punish retakes.
Mid-Control to B Site Splits
Gaining Top Mid denies defenders the chance to delay with early utility. Once attackers secure Mid, they can split B through Market and B Main, forcing the defense to divide resources. This pressure from multiple angles makes it significantly easier to take space on site.
B Site Entry Strategies
When hitting B, clearing tight angles and denying Operators in B Main is crucial. Use utility to cut off CT/Defender Spawn, Market, and Boat House, pushing defenders out of strong positions. After the first pick, the team should burst into the site immediately. Once inside, securing Lane and Back Site provides the best control against retakes.
How To Defend On VALORANT Ascent Map
Defending Ascent revolves around spreading resources across A, Mid, and B without losing overall map control. Maintaining pressure in Mid is crucial: it denies attacker rotations and reveals early executes through proactive utility.
A Site Defensive Setups
Heaven and Tree provide strong anchoring positions, enabling crossfires on A Main and delaying pushes with smokes or flashes. The elevated angles control key entry points, while quick support from Mid or CT helps stabilize the site without giving up space.
Mid Defense Principles
Winning Mid makes it easier to read attacker intentions and cut routes toward A or B. A smoke on Top Mid, slowdown utility on Catwalk, and a support player near Market help maintain presence and force attackers to split their resources.
B Site Defensive Setups
On B, Killjoy and Cypher excel thanks to their control and information tools. Their utility covers B Main Entrance and Lane, allowing defenders to play safe retakes from Market and CT if the site falls.
Tips & Tricks To Win On Ascent
Controlling Mid early in the round is essential for cleaner executions and better reads on defensive rotations. With proper utility usage, you can secure key information and create openings. Use practical VALORANT Ascent map tips and tricks to improve your performance.
- A Main and B Main are two of the most common angles for Operators and aggressive defenders. Safe pre-fires on these corners can prevent early picks.
- Use the skybox for utility lineups, allowing arrows, smokes, and grenades to clear crucial areas without exposing yourself.
- On defense, rely on your Sentinels to cover multiple entry points and use the A Door and Market Door to your advantage to delay pushes or isolate fights.
- Avoid fighting Mid without utility, rotating late, or losing control of the mains, and never force retakes without resources.
FAQs
How do you play the VALORANT Ascent map as a beginner?
Focus on controlling Mid, learning callouts, and playing around your utility.
Which agent is best on Ascent in Valorant?
Omen for Controllers and Sova for Initiators, while Killjoy and Cypher shine in defense.
Is Ascent attacker-sided or defender-sided?
The map design favors the defense, but controlling the mid can determine the balance.
What are the best callouts on the Ascent map?
Key locations include A Main, A Tree, A Heaven, Mid Top, Mid Market, Catwalk, B Main, and CT.
Is Ascent being removed from VALORANT’s map rotation?
Ascent was removed from Valorant’s official competitive map pool for patch 11.08.