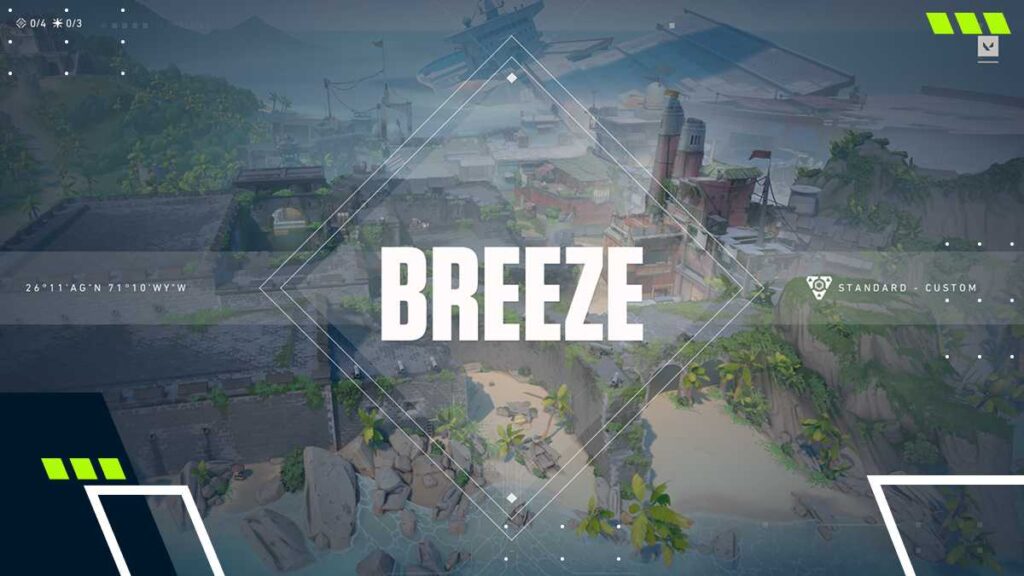
VALORANT Breeze Map: Layout, Callouts, Attack & Defense Strategies

- Breeze’s 2026 rework tightens the map but retains most of its long sightlines, while changing up how A Site, Mid, and B Site are played.
- Utility-focused agents like Viper and Sova are essential for controlling space and clearing angles on Breeze.
- Victory on Breeze hinges heavily on disciplined angle clearing, strong Mid control, and smart use of long-range sightlines.
In VALORANT Season 2026: Act 1 (v12.00), Riot introduced multiple sweeping changes—most notable being a complete Breeze map overhaul. In addition to its return to the competitive map pool, the rework makes the map more compact while still preserving its trademark long sightlines.
In this guide, we’ll break down VALORANT’s new Breeze map bit by bit. We’ll detail all the major changes, new executes, top-level attack and defense strategies, and the best agents for the map.
- 1. What Is The VALORANT Breeze Map?
- What Changed In VALORANT’s Breeze 2026 Rework?
- 2. VALORANT Breeze Map Layout & Callouts
- 3. Best Agents For Breeze In VALORANT
- Best Controllers For Breeze
- Best Duelists For Breeze
- Best Sentinels For Breeze
- Best Initiators For Breeze
- 4. How To Attack On VALORANT Breeze Map
- How To Execute On A Site
- How To Take Mid Control
- How To Attack B Site
- 5. How To Defend On VALORANT Breeze Map
- How To Defend A Site
- How To Defend Mid
- How To Defend B Site
- 6. Tips And Tricks To Win On Breeze In VALORANT
- 7. FAQs
What Is The VALORANT Breeze Map?
Breeze is the sixth map in VALORANT, famous for its vast layout, open spaces, and exceptionally long sightlines.
Introduced on April 27, 2021 (Episode 2, Act 3), it quickly became controversial, with players criticizing its size and heavy reliance on Viper, while other Controller agents in VALORANT struggled to find the same value.
However, the size and sightlines are exactly what make Breeze so unique and different to play on compared to other maps. It’s especially great for anyone who loves long-range duels or having a massive impact playing as Controllers.
The official in-game description reads:
“Take in the sights of historic ruins or seaside caves on this tropical paradise. But bring some cover. You’ll need them for the wide open spaces and long-range engagements. Watch your flanks and this will be a Breeze.”

What Changed In VALORANT’s Breeze 2026 Rework?
Overall, the Breeze rework is primarily focused on making the map more compact, while still leaving in its trademark long sightlines.
On A Site, you’ll find a lot of small changes, like the yellow box being rotated and the boost removed. The trademark Main stairs are also missing, and the entire area has been tightened with a new impenetrable wall. The attacker’s hall entrance has also been removed (again!).
Mid has also been narrowed slightly. The boost wall now requires an agent-specific ability; the Elbow wall has been raised and can’t be jumped on; and the Mid door angle has been slightly deepened.
Finally, B Site saw the fewest changes. The wall by Main has been extended, so Mid is no longer visible from most of the back right of the site. However, Cubby has slightly more space and is a little deeper.

VALORANT Breeze Map Layout & Callouts
| Callout | Description |
|---|---|
| A Bridge | The bridge on A, next to Defender Spawn. |
| A Ramp | The ramp heading into A from Defender Spawn. |
| A Cubby | The cubby on A Site, by the pyramids. |
| A Pyramids | The big pyramids on A Site. |
| A Box | The big yellow box on A Site. |
| A Main | The small shop area outside A, from the attacker side. |
| A Lobby | The big open area heading into A next to Attacker Spawn. |
| Bottom Mid | The attacker side of Mid. |
| Mid Pillar | The big pillar in Mid. |
| Mid Doors | The doors that connect Mid and A Site. |
| Mid Hall | The corridor that connects A Lobby and Mid. |
| Top Mid | The open area of Mid closer to the defender side. |
| Window (Nest) | The raised window area overlooking Mid, near Defender Spawn. |
| B Window | The window that looks into B, close to the Attacker Spawn. |
| B Main | The area just outside of B Site, by B Window. |
| Back B | The area behind the walls on B, furthest from the Spike plant site. |
| B Cubby | The small nook next to the entrance of B from B Main. |
| Elbow | The area that connects B Main to Top Mid. |
| Tunnel | The area that connects B to Top Mid. |
| B Wall | The small wall on B Site, next to Tunnel. |
| B Arches | The large area between B Site and Defender Spawn. |
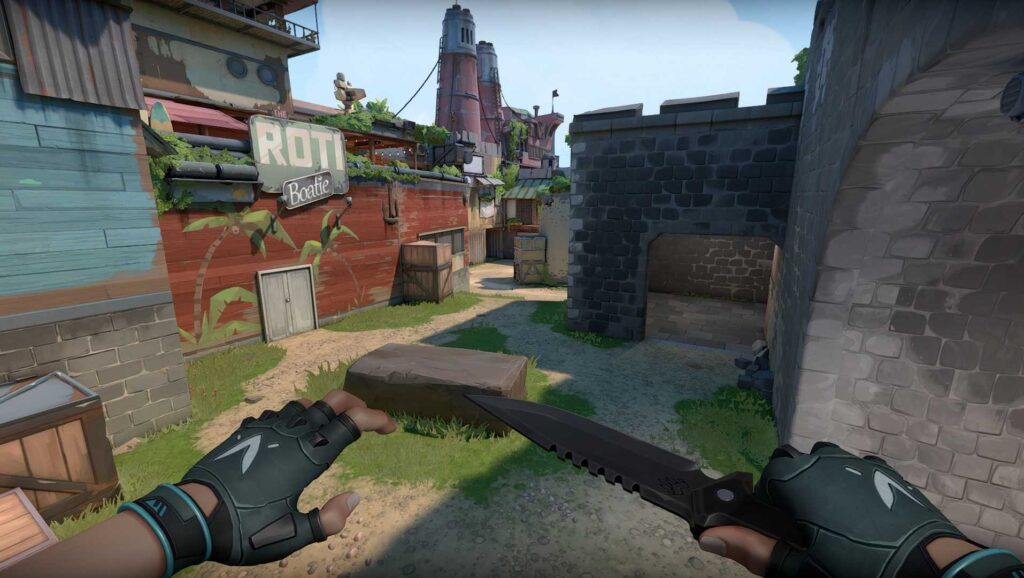
A Site
A Site is the larger and more open Spike plant site on Breeze.
Following the rework, there are now only two entrances onto the site: through A Main and Mid Doors. The entrance from A Main is quite cramped and exposed to a ton of angles, so you’ll usually see this site taken with a split from Mid.
It may seem a bit defense-sided, but if you can get on the site as the attackers, there’s a lot you can do.
For starters, A Site and its surrounding area are very open, allowing you to set up from a ton of different angles. If you manage a successful split through Mid and maintain Mid control, then there’s only really one area the defenders can come from, making retakes very difficult.
Mid
Mid is a bit more simplified after the Breeze rework.
The angles had been cut down a bit, meaning you’re far less exposed to Window and even A Site on the attack. Meanwhile, the boost has been changed to require an ability to access, making it both more difficult and more risky.
As a defender, you can still watch Mid from Window or Tunnel, but now it’s a tad easier for the attackers to block it off and split into A. Additionally, Elbow is more enclosed, requiring greater commitment from both the attacking and defending sides.
Mid remains a very important part of the map; however, now it can be easily split apart.
Both attacking and defending Mid will require a fair bit of push-and-pull. For example, if the defenders see the attackers smoke off the Mid choke, it may require an aggressive Mid push from the defense to ease the A pressure.
B Site
B saw the least changes in the Breeze rework and remains very much an anchor site. That said, there are still lots of cheeky angles for the defenders to take up and fall back to, but it’s now much trickier to watch both B Main and Mid from the site.
This means attackers will want to split onto B, likely from Elbow. Entering exclusively through B Main is a deathtrap, as there are many different angles at which the defenders could be positioned, especially right at the entrance from B Main.
Despite being the smaller Spike plant site, it is still Breeze, after all. This means there are plenty of spots around the site for both teams to take up, especially around walls and arches.
Best Agents For Breeze In VALORANT
Due to Breeze’s size and the sheer number of angles, the best agents will be those that can quickly cover a lot of distance, easily scout out enemies, or block large segments of the map.
Here are the best VALORANT agents for Breeze by category.
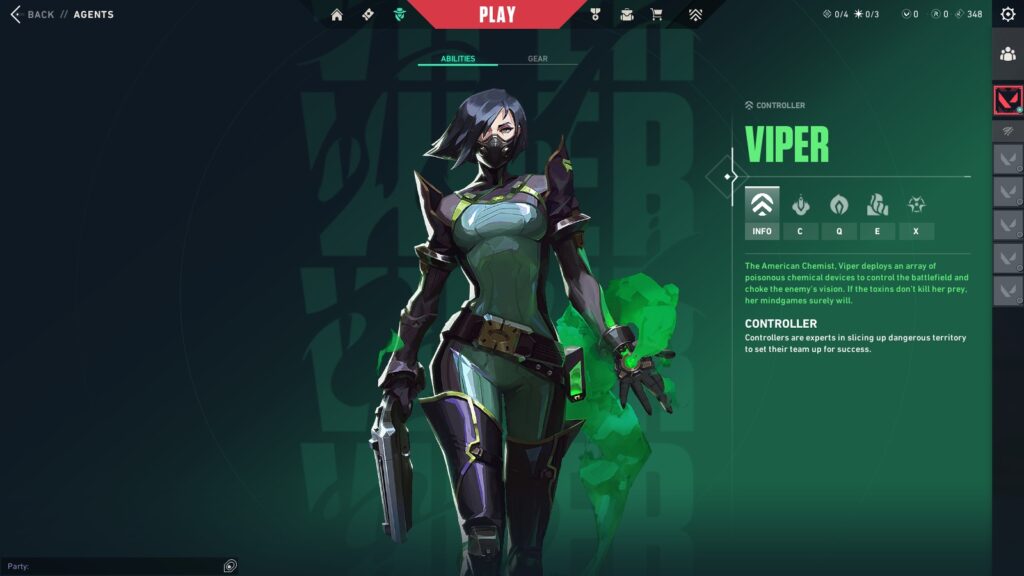
Best Controllers For Breeze
Even after the rework, Viper remains the queen of Breeze. She thrives on the map’s large size and open areas, with her wall quickly and effortlessly cutting off huge chunks of the map and enabling strong play on both attack and defense.
However, other great options include Omen and Brimstone.
Omen benefits from Breeze’s verticality, which allows him to access unique and powerful off-angles, while also being able to throw his smokes practically anywhere. As for Brimstone, Breeze’s map changes have made his smokes a more viable and consistent option than before.
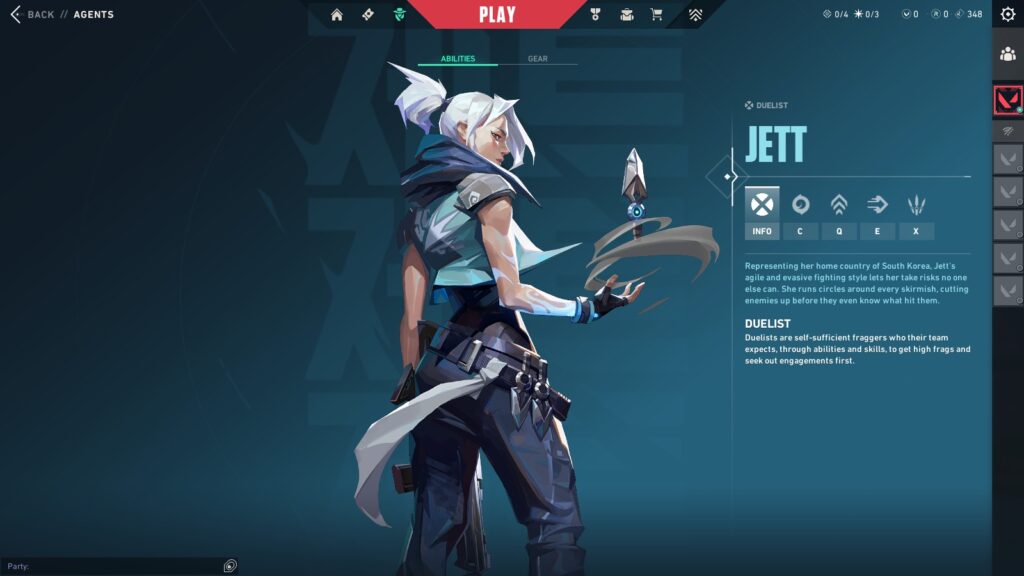
Best Duelists For Breeze
There are multiple strong options for Duelists on Breeze in VALORANT.
Jett is arguably the best and most popular option, excelling at closing gaps and causing chaos. This is especially important for attackers on both A and B Main, as she can dash past the initial angles, allowing her teammates to enter safely while enemy crosshairs are dragged away.
Raze can be another good option. She can do similar things to Jett on the attacking side, but Jett is a slightly better and more consistent option for the Operator. That said, both take advantage of the map’s verticality, which gives them a leg up over other Duelists.
Best Sentinels For Breeze
When it comes to the best Sentinels on Breeze, the choices are quite limited.
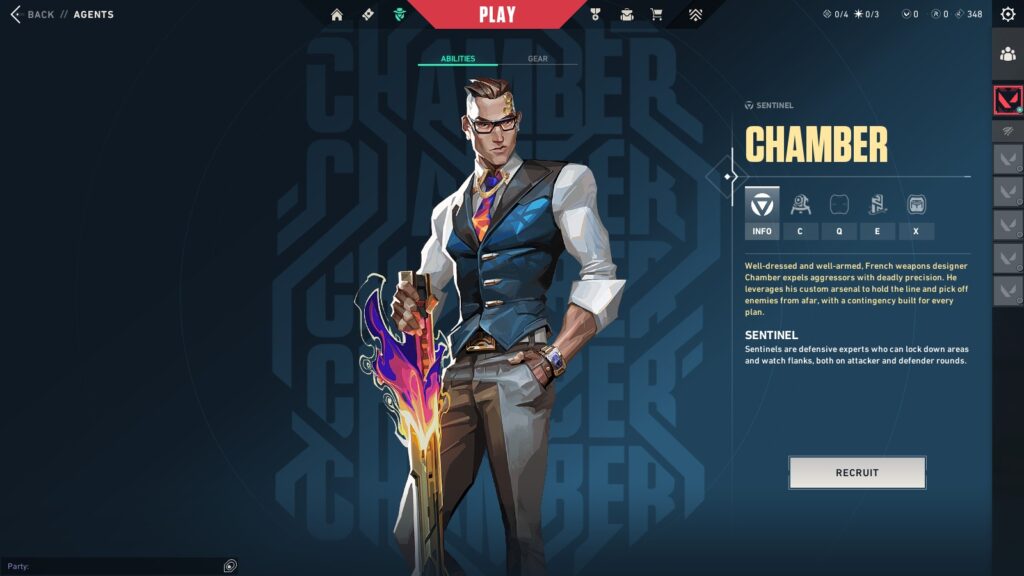
Chamber is undoubtedly the best pick, as his utility allows him to rotate around the map quickly and extract information about key locations. His ultimate is also powerful thanks to its long sightlines, which can make a real difference while holding down an area.
Most other Sentinels struggle on Breeze due to the map’s vast layout—precisely why many teams opt to skip Chamber and run a double Initiator. But if you’d rather stick to your guns, then Cypher and Deadlock are great alternatives, each effective at holding key areas and slowing down a push.
Best Initiators For Breeze
Initiators are extremely important on Breeze as the map has a ton of angles that need to be cleared, plus loads of ground space where people could be hiding.
Sova’s utility shines bright on Breeze. His Recon Bolt has multiple strong lineups that can clear large portions of either bombsite, while his Owl Drone is great for making first contact (especially on A and B, where multiple angles at each entrance can be safely checked before committing).
Another solid option is Fade. Similar to Sova, she can clear large spaces and also has a way to clear close angles, though not as effectively. Her ultimate is also amazing for taking over an entire site, but overall, her kit suits the map less than Sova’s.

How To Attack On VALORANT Breeze Map
Attacking on Breeze can feel quite difficult. The map is vast, making rotations tricky, and both sites have a small entry point that is open to multiple angles. This means that precise utility and strong site hits are the keys to success.
Here are the best ways to attack all three key areas of Breeze in VALORANT:
How To Execute On A Site
Taking A Site on Breeze is a bit like clearing a minefield. The main entry from A Main is exposed to numerous angles, from close corners on both sides of the exit to the long, punishing sightline stretching all the way to Bridge.
Beyond that, there are also multiple levels of verticality to consider, with the site itself being slightly lower than the surrounding area and the Bridge and yellow box being significantly higher. Taking these factors into account, utility is key.
Smokes (or preferably a Viper wall) need to be used to cut off the long sightlines, while utility like Sova’s Owl Drone clears out the close angles. It’s also beneficial to apply pressure to the site itself, with flashes or displacement utilities.
Another option is to split into A through Mid. This requires more utility to be committed, especially smokes (or again a well-positioned Viper wall), to secure the cross from Mid to Doors. Whichever tactic you use, smokes and utility to clear out the close angles are vital.
How To Take Mid Control
Mid on Breeze is unique, as there are multiple ways to approach it.
You can take partial Mid control by smoking off near the pillar and heading to A from Doors, or smoke Doors and Window before heading to B, or even approach it from Elbow and the attacker’s side of Mid.
The main point to consider from Mid is Breeze’s trademark long sightlines.
Window and Tunnel (despite being less commonly held by defenders) are key power positions that must be blocked off every time. As an attacker, you should also consider the fast Elbow flank, making it vital to either leave a player watching it or use utility to keep your flank covered.
How To Attack B Site
Similar to A Site, B Site also offers a ton of angles for attackers to consider, especially right after the entrance to the site from B Main. This means that utility is once again key, especially to either reveal or displace players in the close angles, as well as to reveal back B.
A key difference to A Site, however, is that you have quick access to a B split thanks to the Elbow position. You can smoke off Window and split into B. This is a lot more powerful after the rework, as the B Site defenders can no longer watch both Tunnel and B Main from as many spots.
This site doesn’t have as many long sightlines as the rest of Breeze. So if you’re going for a straight-up execute, you can smoke off around the pillar, and then only really have to worry about clearing all the close angles and back B. Then, once your smokes fade, you can look at the two main retake angles, Arches and Tunnel.
How To Defend On VALORANT Breeze Map
Breeze is a naturally defender-sided map in VALORANT because both sites have multiple angles that you can take advantage of. However, the caveat is that rotations can be challenging, so we’ve explained how to defend each part of the map below.
How To Defend A Site
There are two key things to consider when playing defense on A Site. The first is the long sightlines. If you’re using an Operator or confident in your aim, you can set up on Bridge to watch A Main, which also allows you to quickly rotate to help Mid.
The other key factor is the verticality. You can make use of the yellow box, the boxes behind the pyramid, and even the site itself to catch opponents off guard and secure easy kills. The verticality is an especially powerful tool, and it makes Agents like Jett really powerful on A Site.
A Site also has a quick and direct connection to Mid, which means one player will have to watch Mid Doors, either to support the Window player or to keep that area secure for the player on A Site.
How To Defend Mid
Defending Mid on Breeze tends to be quite passive and centered around dealing with smokes. Window is a prime spot for the Operator, but you’ll be smoked out most of the time. Your options are to either wait it out, rotate, or play Tunnel to at least have control of the top side of Mid.
Other options include pushing into Elbow to either flank or just watch for a B split—or you can try to collapse into Mid by pushing through Window and Mid Doors. Most of the time, however, the best choice is to play it passively and just rotate to whichever site gets hit.
If the attackers are playing heavy Mid control, you can watch Window from the Defender Spawn, and then rotate once they decide on A or B.
How To Defend B Site
Defending on B site is all about making use of the site’s plethora of angles. Your goal should be to get a clean pick off and fall back, or slow down the attackers at the key chokes (Main or Tunnel).
You should be extra careful when facing a Sova, as there are many amazing dart locations that can reveal practically the entire site. They usually land somewhere around back B, so either be on the lookout for those and shoot them down, or make sure you’re hidden from them.
Importantly, always remember to mix up your positioning on B. With so many possible angles, it’s vital to keep the attackers guessing, and it helps to secure easy kills as your opponents won’t know where to look!
Tips And Tricks To Win On Breeze In VALORANT
Now that you have the low-down on how to play Breeze in VALORANT, let’s take a look at some top-level tips and tricks to take your gameplay to the next level.
Pick Sova or Viper
It might seem underwhelming, but Sova and Viper absolutely thrive on Breeze.
If you have both of these Agents on your team and your opponents don’t, you’re already at an advantage. They aren’t overly complicated either—all you have to do is learn a few basic lineups, and you’ll make your team’s day.
Remember The Angles
One of the most important aspects of playing Breeze is staying aware of angles on both attack and defense.
With so many positions to check on each Site, it’s ultimately solid positioning and disciplined clearing that decides rounds. For example, defenders should constantly vary their setups to stay unpredictable, while attackers must remember to methodically clear every angle, every time.
Utilize Breeze’s Long Sightlines
Breeze’s long sightlines are its trademark feature, and knowing how to use them can be a key to victory.
That said, you need to get comfortable with the long sightlines (like Mid Window or Bridge to A Main) and understand how to both use and counter them. The Operator is especially good for these positions, as well as well-placed smokes or flashes.
FAQs
How do you play Breeze in VALORANT as a beginner?
As a beginner in VALORANT, you should focus on clearing Breeze’s many angles and master simple utility usage to flush out defenders holding long sightlines on both sites.
What are the best Agents to use on Breeze?
The best Agents on Breeze are Viper, Sova, Jett, Chamber, Omen, Fade, and Deadlock.
How do you defend A and B Sites on Breeze effectively?
Defending A and B Sites on Breeze relies heavily on angles. There are many positions to play from, and even minute changes to your positioning can give you a huge advantage in fights. Make sure to mix it up so your opponents can’t predict exactly where you’ll be.