If you’re looking to diversify your content portfolio as a streamer, you’ll want to learn how to save Twitch streams. It’s a valuable piece of knowledge that can empower you to spread your content far and wide, using that downloaded Twitch stream for a multitude of things. With this guide in your hand, you’ll learn everything you need to know about Twitch VODs, from how to enable them to how to download them – and what to do with them afterwards.
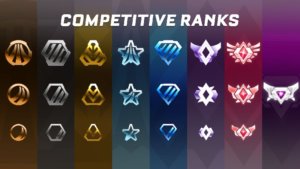
It’s one of the many reasons that the Twitch platform is, statistically, the most popular site for streamers. As you climb the ranks, you’ll unlock more benefits, one of which is the longer storage of Twitch VODs (videos-on-demand). This is a system that acts as a repository for your old content, allowing you to download it whenever you want. So, if you’re eager to learn how to save Twitch streams, read on – we’ve covered the whole process in this guide.

Why Should You Save Twitch Streams?
If you want to learn how to download Twitch streams, there’s likely a very good reason for doing so. Most commonly, creators will download their Twitch streams to use them in another way. For example, some of the best streamers around will re-upload cut and edited portions of that Twitch stream to YouTube, effectively enabling them to reach a whole other audience. It’s a quick, easy way to spread your content across multiple top-tier platforms.
For those eager to learn how to stream on Twitch, knowing that you can save your Twitch streams is an absolute boon. If you’re a regular user and you’re getting started with streaming, your past broadcasts will be saved on the Twitch platform for two weeks. However, once you level up and learn how to grow on Twitch, you’ll eventually reach the Affiliate level, unlocking sixty days of VOD storage.
If you want to grow rapidly, then you’ll need to download those Twitch streams and use them to boost your content across other platforms. Like with Twitch clips, you can cut and edit an entire Twitch stream to reupload parts of it to short-form platforms like TikTok.
How To Save Twitch Streams
It’s a relatively simple process to learn how to save Twitch streams, and it can be accomplished in just a few seconds. Like many platforms in the space, Twitch aims to be as accessible as possible, and it’s a very user-friendly platform. It doesn’t matter if you’re the newest streamer on the site and totally unfamiliar with how it works, it takes mere minutes to get up and running. Here’s what you’ll need to do to save your Twitch streams:
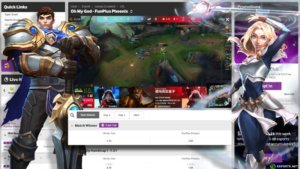
- When you’ve made your account, navigate to the Creator Dashboard and scroll down to the Settings drop-down.
- Expand the selection and click on Stream, before locating the VOD Settings section of the new page.
- Simply toggle the slider on the Store past broadcasts option, and that’s it – your past broadcasts will now be saved for 14 days.
Again, this window can be extended by becoming a Twitch Partner or Affiliate, or by securing Twitch Turbo or a Twitch Prime subscription. While you’re in this menu, it’s also a good idea to hit the slider on the Enable Clips option, as this will permit you and other users to capture short-form clips on the platform. With these, users can easily recycle the footage on platforms like YouTube and TikTok, further boosting their footprint.
Read Also: What's The Longest Twitch Stream?
But how do I actually download my Twitch streams?
That’s a great question – you’ve enabled the option to save them but how do you actually download the streams?
Firstly, navigate to the same section – the settings menu. From here, locate the Video Producer tab and access it, which will bring you to a page that’s packed full of your old streams and any clips that have been captured. Then, it’s a simple case of just finding the specific stream you want to save, hitting Download, and then actually saving the stream once it has been processed.
Following the download’s completion, you’re free to do with that stream as you please!

© LemonKiwi
Important Information About Twitch VODs
As one of the best tips in our streaming tips, we’d advise you to make good use of your Twitch VOD capabilities. From re-uploading them to using them as a resource for viewers that maybe missed a stream or two, there’s plenty that you can do with them.
Here are a few more pieces of information that are important about Twitch VODs:
- You can select to only manually publish VODs, which may stop you from accidentally publishing VOD content for a stream you may have messed up.
- If you break the rules and play copyrighted video or audio on stream, Twitch will automatically lock down your ability to publish VODs.
- You can exclude certain categories, so VODs won’t be saved or published if you’ve broadcasted something you don’t want people to see.
That’s everything that you’ll ever need to know about how to save Twitch streams. We hope you can use this information to further yourself as a creator and reach new heights! Maybe one day you’ll be ranking up there as one of the most subbed Twitch streamers in the world – anything is possible!
Read Also: How to Raid on Twitch